Unity3D Skybox with Terragen2 Generated Images – Part 1

The overall objective is create a skybox within Unity using images generated with Terragen2.

The objective of this tutorial is to use Terragen2, and input the minimum settings required to export images for a seamless skybox with clouds, within Unity.

1. Launch Terragen2 and begin a new project.

2. Set up the render camera

(a) Click the Cameras button near the top.

(b) Select the /Render Camera in the top left quadrant.

(c) Change all rotation values to 0.

(d) Make sure Perspective is checked and Use horizonal fov is set to 90

Camera_button

3. Add clouds to your atmosphere.

(a) Click the Atmosphere button near the top.

(b) Click the AddCloud Layer button above the right quadrant.

(c) Choose /Altocumuls from the drop-down list.

Add_clouds

4. Render your images

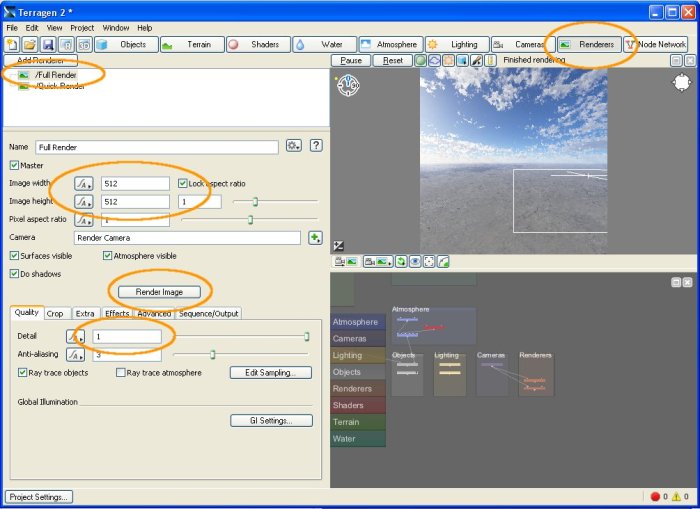
(a) Click Renderers button near the top.

(b) Select /Full Render in the top left quadrant.

(c) Change Image width and Image height to 512 and lock aspect ratio.

(d) Make sure Detail is set to 1 to prevent any seams appearing in your Skybox.

(e) Click Render Image button to open Render View window and render the image.

set_up_renderer

5. (a) After render is complete click the save button and save image as skybox-front.bmp to your ..\Unity_Project\Assets\  folder.

render_view_save

6. Render the remaining images required for skybox.

(a) Change camera rotation values as you did in step 1c.

(b) Render and save each of the following images to your  ..\Unity_Project\Assets\ folder as you did in step 5a.

skybox-front.bmp

skybox_front

skybox-back.bmp

skybox_back

skybox-left.bmp

skybox_left

skybox-right.bmp

skybox_right

skybox-up.bmp

skybox_up

skybox-down.bmp

skybox_down

Reference Resources:

http://rabiuls.wordpress.com/2010/09/21/making-skybox-with-terragen-for-unity-3d/

http://planetside.co.uk/wiki/index.php?title=Quick_Start

http://docs.unity3d.com/Documentation/Manual/HOWTO-UseSkybox.html

http://www.planetside.co.uk/

Unity3D – How to make a simple first person walkthrough

Simple_walkthrough

The objective of this project was to create the most bare bones playable first person walkthrough.

Reference : http://docs.unity3d.com/Documentation/Manual/HOWTO-FirstPersonWalkthrough.html

I created my new Unity project folder on the desktop for ease of access. I find digging through My_Documents cumbersome.

1. Import your level. See here on how to import geometry from your art package into Unity.

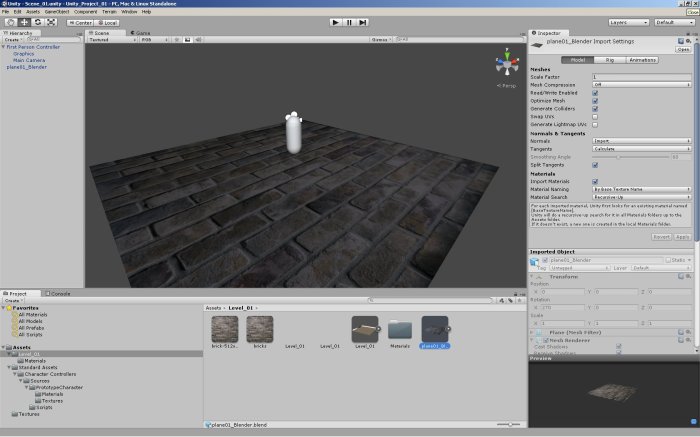
This was simple as saving my .blend file in the Unity project asset folder. According to the unity manual, this works under the hood by using Blender’s FBX exporter. My geometry was a simple plane mesh object. The texture was a generic brick texture. Textures require UV coordinate to appear in Unity.

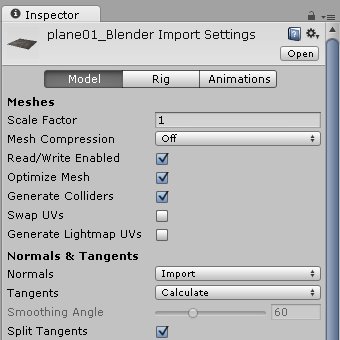
2.  Select the imported model file and enable Generate Colliders in the Import Settings in the Inspector.

generate_colliders

3. Locate the Standard Assets->Prefabs->First Person Controller in the Project View and drag it into the Scene View.

Unity4 required the character controller package be imported first, from the menu select  Assets ->  Import Package -> Character Controller. The Importing Package dialog box will appear, select all and click import. The 1st person character controller then becomes available in the standard assets folder, and can be drag and dropped right into the scene.

4. Make sure that the scale of your level is correct. The First Person Controller is exactly 2 meters high, so if your level doesn’t fit the size of the controller, you should adjust the scale of the level size within your modeling application. Getting scale right is critical for physical simulation, and other reasons documented at the bottom of this page. Using the wrong scale can make objects feel like they are floating or too heavy. If you can’t change the scale in your modeling app, you can change the scale in the Import Settings… of the model file.

This made no different in this project considering the only object was a mesh plane.

5. Move the First Person Controller to be at the start location using the Transform handles. It is critical that the first person controller does not intersect any level geometry, when starting the game (otherwise it will be stuck!).

6. Remove the default camera “Main Camera” in the hierarchy view. The First person controller already has its own camera.

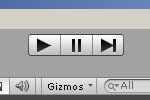
7. Hit Play to walk around in your own level.

hit_play

Package your game into an executable;  File -> Build Settings. Add your current scene to scenes in build list, choose your platform and click build, choose your location to save the Executable file.

This simple walk through is best thought of as a blank canvas to build off of and begin creating worlds.

Gimp 2.8 – Installing New Plugins

Gimp 2.8
Gimp 2.8

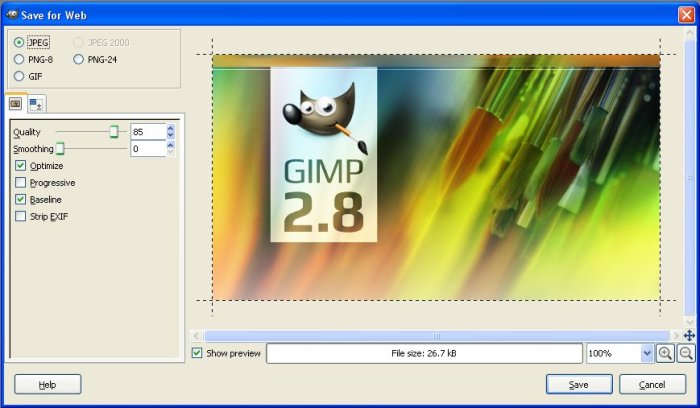
I installed Gimp 2.8. Saving non proprietary files formats, such as jpg and png, in previous versions was cumbersome.  Gimp 2.8 is somewhat better, you must export to different formats rather than save. I want to be able to quickly save optimized images in common web formats. My solution; install the ‘save for web’ plugin.

1.Download Plugin for windows at http://registry.gimp.org/files/save_for_web_0.28.6_win32.zip

2.Extract Plugin to appropriate plug-ins directory

  • Plug-ins in the form of .exe need to be in the \plugin-ins  folder;  ie ..\Program Files\GIMP 2\lib\gimp\2.0\plug-ins
  • Plug-ins in the form of .scm files need to be placed in the \scripts folder; ie ..\Program Files\GIMP 2\share\gimp\2.0\scripts

3.Restart Gimp

Gimp 2.8 Save for Web

‘Save for web’ feels more efficient and automatically optimizes images for the right balance of size and quality.

Resources

http://registry.gimp.org/node/33 – Save for web plugin

http://registry.gimp.org/node/20811 – Installing plugins