Unity 4 – Experimenting with Cars

September 05 / 2014

Followed this tutorial

http://forum.unity3d.com/threads/basic-to-advanced-car-or-vehicle-tutorial.86703/

Some things to keep in mind that was not mentioned in the tutorial

  1. The forward direction of your car is the Z axis – make sure all object Z axis are aligned with the word Z axis during setup
  2. Make sure the wheel collider gizmo line is pointing from the center down – the direction of the ground.
  3. When adding the wheels with wheel colliders to the CarController1 wheels array start with; frontRight, frontLeft, rearRight, rearLeft
  4. Fix camera smooth follow issues by parenting an empty to the car and using the empty as the Target for the camera to follow

Another thing to consider is scale and unit setup; 1 Unit in unity is supposed to represent 1 Meter. That makes our car 5 meters long and 3 meters wide; not to realistic.

Also there is the issue of the car rolling over around corners. So far the most practical solution would be to implement stabilizaton as described in the following tutorial.

http://forum.unity3d.com/threads/how-to-make-a-physically-real-stable-car-with-wheelcolliders.50643/


Unity4 Scripting – Choose / Select from Array

A simple script that cycles through an array

using UnityEngine;
using System.Collections;

public class Selector3 : MonoBehaviour {

public GameObject[] selectionSet;
GameObject selection;
//GameObject nextSelection;
//GameObject previousSelection;
int index = 0;

//Vector3 previousPosition = new Vector3(-1,0,0);
Vector3 selectionPosition = new Vector3(0,0,0);
//Vector3 nextPosition = new Vector3(1,0,0);

// Use this for initialization
void Start () {

selection = Instantiate (selectionSet [index], selectionPosition, Quaternion.identity) as GameObject;

}

// Update is called once per frame
void Update () {

if(Input.GetKeyDown(KeyCode.RightArrow)){

Destroy(selection);

if(index < (selectionSet.Length – 1)){ index++; } else { index = 0; } selection = Instantiate (selectionSet [index], selectionPosition, Quaternion.identity) as GameObject; } if(Input.GetKeyDown(KeyCode.LeftArrow)){ Destroy(selection); if(index > 0){
index–;
} else {
index = (selectionSet.Length – 1);
}

selection = Instantiate (selectionSet [index], selectionPosition, Quaternion.identity) as GameObject;
}

}
}

Unity3D Skybox with Terragen2 Generated Images – Part 2

1. Start Unity and load project

2. Create Unity Skybox Material

(a) click on the menu Assets -> Create -> Material and name the new material SkyBox

Unity_Create_Skybox_Material

(b) Select the SkyBox material from assets and in the inspector click the Shader button and select RenderFX -> Skybox

(b) In Assets Select the SkyBox material and in the Inspector click the Shader button and select RenderFX -> Skybox

Unity_Create_Skybox_Material_02

3. Make sure all the Terragen2 SkyBox images Wrap Mode are set to Clamp

(a) In Assets locate and Select the SkyBox images

(b) In the inspector click the Wrap Mode button and  select clamp

Unity_wrap_mode_clamp

4. Add Terragen2 Skybox images to the Unity SkyBox material.

(a) Select the SkyBox material in Assets

(b) Click and drag SkyBox-Front image from Assets to the Front slot of the SkyBox material in the inspector.

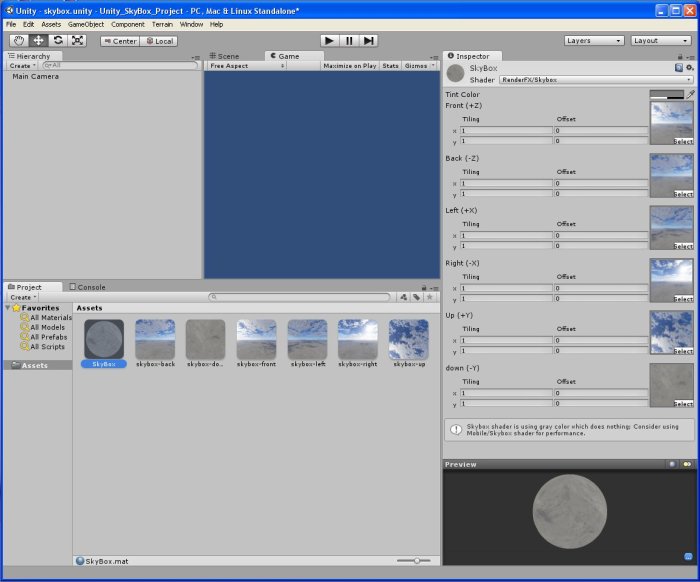
(b) Click and drag SkyBox images from Assets to corresponding slots of the SkyBox material in the inspector.

Unity_drag_and_drop_corresponding_images

5. Apply Skybox Material in Render Settings

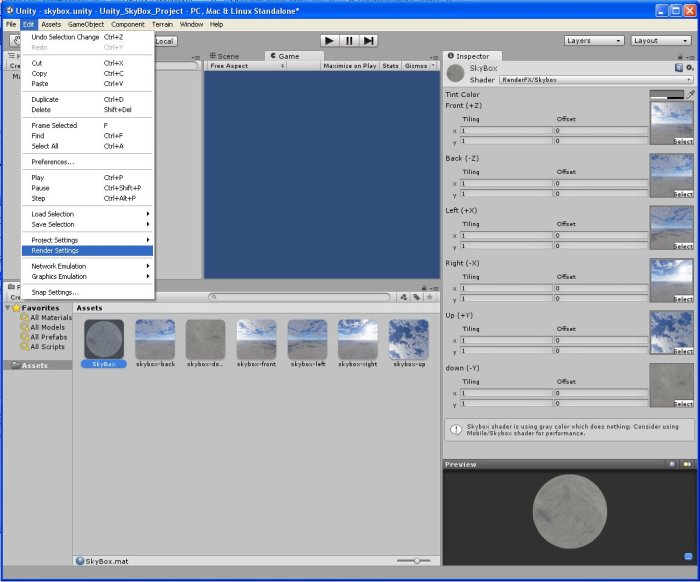
(a) From the menu click Edit -> Render Settings to open the render setting in the inspector

Unity_render_settings

(b) Drag your Skybox material from Assets to Skybox Material Slot in the inspector for Render Settings

Unity_drag_and_drop_SkyBox_render_settings