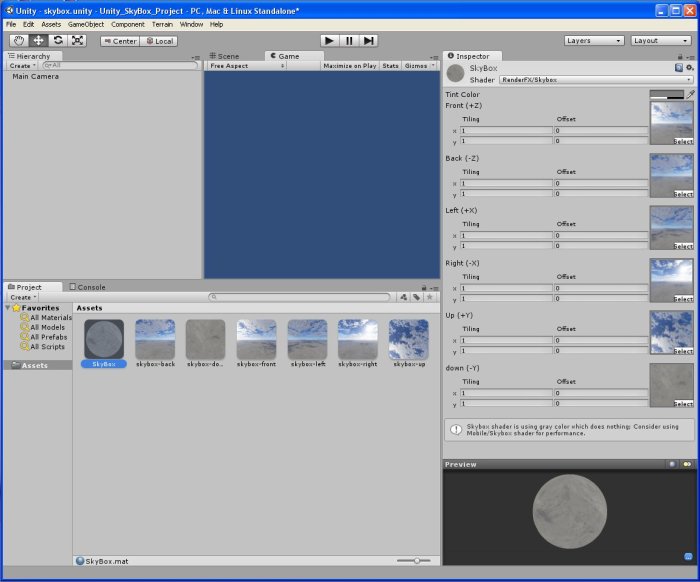
1. Start Unity and load project
2. Create Unity Skybox Material
(a) click on the menu Assets -> Create -> Material and name the new material SkyBox
(b) Select the SkyBox material from assets and in the inspector click the Shader button and select RenderFX -> Skybox
(b) In Assets Select the SkyBox material and in the Inspector click the Shader button and select RenderFX -> Skybox
3. Make sure all the Terragen2 SkyBox images Wrap Mode are set to Clamp
(a) In Assets locate and Select the SkyBox images
(b) In the inspector click the Wrap Mode button and select clamp
4. Add Terragen2 Skybox images to the Unity SkyBox material.
(a) Select the SkyBox material in Assets
(b) Click and drag SkyBox-Front image from Assets to the Front slot of the SkyBox material in the inspector.
(b) Click and drag SkyBox images from Assets to corresponding slots of the SkyBox material in the inspector.
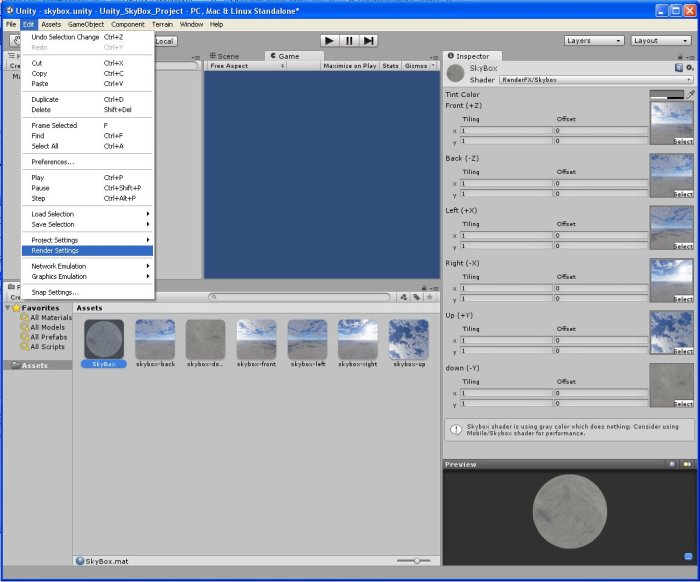
5. Apply Skybox Material in Render Settings
(a) From the menu click Edit -> Render Settings to open the render setting in the inspector
(b) Drag your Skybox material from Assets to Skybox Material Slot in the inspector for Render Settings


